How to Configure Location-Based Conditional Access Policies in Entra ID
What Are Location-Based Conditional Access Policies?
Imagine this scenario: You receive a sign-in alert from Microsoft Entra ID at 3:00 AM. A user from your New York office has just authenticated from an IP address in Russia. Your heart sinks. Is this a compromised account? A traveling employee? Or something more sinister?
This is exactly the kind of scenario that location-based Conditional Access policies are designed to address. They give you the ability to control access to your cloud apps based on the network location of a user.
At its core, a location-based policy is a security rule that evaluates the geographic or network origin of every sign-in request. When a user attempts to access your Microsoft 365, Azure, or other Entra ID-protected resources, the policy checks where the request is coming from. Based on that information, it can either grant access, require additional verification (like MFA), or block the request entirely.
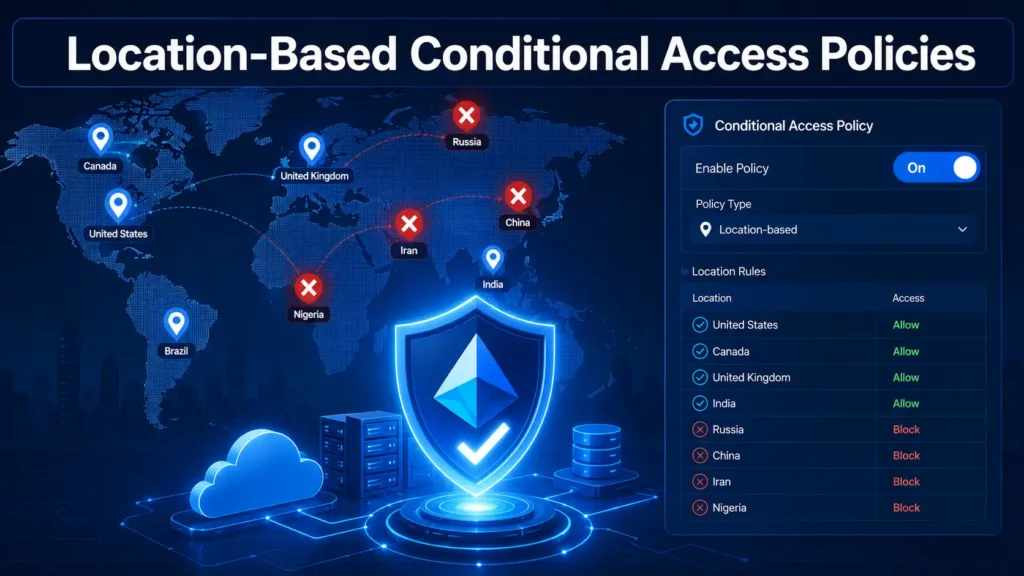
These policies are commonly used to block access from countries or regions where your organization knows traffic shouldn’t come from. For example, if your company operates exclusively in the United States and Canada, you can create a policy that blocks all sign-in attempts from any other country. This immediately eliminates a massive attack surface.
But location-based policies are not just about blocking. They are equally valuable for creating conditional access rules that require MFA when users are outside trusted networks, or for enforcing stricter security controls when employees travel to high-risk regions. The flexibility of location-based Conditional Access policies makes them one of the most powerful tools in your Entra ID security arsenal.
What makes these policies particularly effective is their integration with Microsoft’s threat intelligence. When combined with Identity Protection risk signals, location data can help identify and block sophisticated attacks before they cause damage. A sign-in from a country you never operate in, combined with unusual behavior patterns, triggers immediate action—often before the attacker even knows they’ve been detected.
Explore more on Byqus Tutorials and Entra ID / Identity Section.
Why Location-Based Policies Are Essential for Zero Trust Security
Zero Trust security is built on a simple but powerful principle: never trust, always verify. Location-based Conditional Access policies are a perfect embodiment of this philosophy. They verify every sign-in attempt based on where it originates, regardless of whether the user is inside or outside your corporate network.
In the traditional perimeter-based security model, users inside the corporate network were automatically trusted. This created a massive blind spot. If an attacker compromised an internal device or gained access to the corporate network, they could move laterally with impunity. Location-based policies eliminate this assumption of trust by continuously evaluating the network location of every sign-in attempt.
Here are the key reasons why location-based Conditional Access policies are essential for any Zero Trust strategy:
- Attack surface reduction: By blocking access from countries or regions where you have no business presence, you immediately eliminate a significant portion of automated attacks. Credential stuffing and password spray attacks often originate from specific geographic regions. These policies stop these attacks at the gate.
- Risk-based access control: When users travel to high-risk locations, location-based policies can require additional verification—like MFA or device compliance checks—before granting access. This reduces the risk of compromised credentials being used from untrusted locations.
- Regulatory compliance: Many industries have data sovereignty requirements that mandate where data can be accessed from. Location-based Conditional Access policies help enforce these requirements by restricting access to specific geographic regions.
- Detection of compromised accounts: When a legitimate user’s account is compromised, attackers often sign in from unexpected locations. Location-based policies can flag these anomalies and trigger additional security measures.
The location condition is so fundamental to Zero Trust that Microsoft has integrated it deeply into the Conditional Access framework. As of recent updates, the location condition has been renamed to “Network” to better reflect its role in evaluating network signals alongside other conditions like device state and user risk.
When you configure location-based Conditional Access policies, you gain the ability to make real-time access decisions based on a user’s public IP address or, in some cases, GPS coordinates provided by the Microsoft Authenticator app. This dual approach ensures that location data is as accurate and reliable as possible.
Understanding Named Locations in Entra ID
Before you can create location-based Conditional Access policies, you need to understand the concept of Named Locations. Named locations are the building blocks of any location-based policy. They are pre-defined geographic or network locations that you can reference in your policies.
Think of Named Locations as labels you create for specific IP ranges or countries. Instead of typing IP addresses or country names every time you create a location-based policy, you define them once as Named Locations and then reuse them across multiple policies. This makes your policies easier to manage and maintain.
Types of Named Locations
Microsoft Entra ID supports two primary types of Named Locations:
- IP Ranges Location: This allows you to define a location based on specific IPv4 or IPv6 address ranges. You can mark an IP range as a “trusted location,” which is useful for your corporate office networks, VPN ranges, or other trusted network segments.
- Countries Location: This allows you to define a location based on countries or regions. You can select specific countries from a list or choose to include “unknown areas” that don’t map to specific countries.
Each Named Location must have a unique, descriptive name. I recommend using a naming convention that clearly indicates the purpose and type of location. For example: “Corporate Office – New York (IP)” or “Blocked Countries – High Risk.”
How User Location Is Determined
Entra ID determines a user’s location using two primary methods:
- Public IP address: The most common method. When a user signs in, Entra ID captures their public IP address and maps it to a geographic location using IP geolocation databases.
- GPS coordinates: For users with the Microsoft Authenticator app installed, Entra ID can request GPS coordinates to determine location with greater precision. This is particularly useful for mobile scenarios where IP-based geolocation may be less accurate.
This dual approach ensures that your location-based policies have access to the most accurate location data available, reducing false positives and improving security effectiveness.
Pro Tip: When creating Named Locations for your corporate offices, include both the primary IP range and any VPN or remote access IP ranges that your employees use. This ensures that remote workers are correctly identified as being on the trusted network.
Step-by-Step Guide to Configure Location-Based Conditional Access Policies
Now that you understand the fundamentals, let me walk you through the complete process of configuring location-based Conditional Access policies. We will start by creating Named Locations and then build a policy that blocks access from high-risk countries.
Step 1: Create a Named Location
Before creating any location-based policy, you need to define the Named Locations you will use. Here is how:
- Sign in to the Microsoft Entra admin center as at least a Conditional Access Administrator.
- Browse to Entra ID → Conditional Access → Named locations.
- Click + Countries location or + IP ranges location depending on your needs.
- For Countries location:
- Give your location a name (e.g., “Blocked Countries – High Risk”).
- Select the countries or regions you want to include.
- Optionally, check Include unknown areas if you want to block IP addresses that cannot be mapped to a specific country.
- For IP ranges location:
- Give your location a name (e.g., “Corporate Office – New York”).
- Enter the IP ranges (CIDR notation or individual IPs).
- Optionally, check Mark as trusted location if this is a trusted network.
- Click Create to save your Named Location.
Step 2: Create the Policy
With your Named Locations defined, you can now create the location-based policy:
- In the Entra admin center, browse to Entra ID → Conditional Access → Policies.
- Click + New policy.
- Give your policy a meaningful name, such as
Block Access from High-Risk Countries. - Under Assignments → Users or workload identities:
- Include: Select All users.
- Exclude: Select your emergency access or break-glass accounts. This is critical to prevent lockout.
- Under Target resources → Resources (formerly cloud apps):
- Include: Select All resources (formerly “All cloud apps”).
- Under Network (formerly “Locations”):
- Set Configure to Yes.
- Under Include, select Selected networks and locations.
- Select the Named Location you created (e.g., “Blocked Countries – High Risk”).
- Under Access controls → Grant:
- Select Block access.
- Set Enable policy to Report-only.
- Click Create to save your policy.
Step 3: Advanced Configuration Options
Beyond the basic block policy, location-based Conditional Access policies offer several advanced configuration options:
- Any network or location: Applies the policy to all IP addresses, including any address on the internet. You can then exclude specific locations to apply the policy everywhere except trusted networks.
- All trusted networks and locations: Applies the policy only to locations marked as trusted. This is useful for requiring additional security measures even when users are on the corporate network.
- All Compliant Network locations: Available for organizations with Global Secure Access, this applies the policy to users and devices that comply with your organization’s security policies.
These options give you fine-grained control over how your location-based policies are applied, allowing you to create sophisticated security rules that adapt to different scenarios.
Testing Location-Based Policies with Report-Only Mode
As with all Conditional Access policies, I strongly recommend testing your location-based policies in Report-Only mode before enforcement. This is especially important because they can have a significant impact on user productivity if misconfigured.
What Report-Only Mode Reveals
When your location-based policy is in Report-Only mode, Entra ID evaluates every sign-in request against the policy but does not enforce it. Instead, it logs the results, giving you critical insights:
- Users affected: How many users would be blocked by this policy?
- Legitimate travel: Are there users who legitimately travel to the blocked countries?
- False positives: Are there any IP ranges that are incorrectly geolocated?
- Attack attempts: Are there any malicious sign-in attempts from blocked locations?
How to Analyze Report-Only Results
- Navigate to your location-based policy in the Entra admin center.
- Click on the Report-only tab.
- Review the dashboard showing affected users and sign-in attempts.
- For any users who would be blocked, investigate whether they have legitimate reasons to access from blocked locations.
Pro Tip: Leave your location-based Conditional Access policy in Report-Only mode for at least 7-14 days. This gives you a full business cycle to identify any patterns—like employees who travel regularly or remote workers who use VPNs that route through unexpected countries.
Using the What-If Tool
The What-If tool is particularly valuable for testing location-based policies:
- Go to Conditional Access → What-If.
- Select a user and specify a location (you can enter an IP address or select a country).
- The tool will simulate your location-based policies and show you what action would be taken.
This allows you to test edge cases—like what happens when a user signs in from a VPN that routes through a different country—without waiting for real sign-in events.
Common Location-Based Policy Scenarios
Here are the most impactful location-based Conditional Access policy scenarios that I recommend every organization implement:
Scenario 1: Block Access from High-Risk Countries
This is the most common location-based policy scenario. If your organization operates only in specific countries, block all sign-in attempts from everywhere else.
- Named Location: Countries location with all countries except your operating regions
- Policy: Block access
- Exclusions: Break-glass accounts, service accounts that may use global routing
This policy immediately eliminates a massive attack surface. Attackers scanning for vulnerabilities from blocked regions won’t even get past the first authentication step.
Scenario 2: Require MFA Outside Trusted Networks
This policy requires multi-factor authentication when users sign in from outside your corporate network. This ensures that even if credentials are compromised, attackers can’t access resources without the second factor.
- Named Location: IP ranges location for corporate offices (marked as trusted)
- Policy: Grant access → Require MFA
- Network condition: Any location EXCEPT trusted locations
This approach balances security and productivity—users inside the office enjoy seamless access, while remote users face the appropriate security controls. Location-based Conditional Access policies make this distinction automatic.
Scenario 3: Block Access from Unknown Areas
Some IP addresses cannot be mapped to a specific country or region. This policy blocks these “unknown areas” to prevent attackers from exploiting geolocation gaps.
- Named Location: Countries location with “Include unknown areas” checked
- Policy: Block access
This is a more aggressive location-based policy that can block legitimate users who are using VPNs or proxies that obscure their true location. Use with caution and test thoroughly in Report-Only mode.
Scenario 4: GPS-Based Location for Mobile Users
For users accessing resources from mobile devices, you can use GPS-based location policies for greater accuracy.
- Policy: Grant access → Require MFA
- Network condition: GPS location from Microsoft Authenticator app
When configured in report-only mode, GPS-based policies prompt users to share their GPS location. Not sharing this information may result in a block.
Best Practices for Location-Based Policies
To maximize the effectiveness of your location-based Conditional Access policies while minimizing user disruption, follow these best practices:
| Best Practice | Why It Matters |
|---|---|
| Always test in Report-Only first | Location-based policies can have unexpected impacts on traveling employees, remote workers, and users with VPNs. Report-Only mode reveals these before enforcement. |
| Maintain break-glass exclusions | Every location-based policy must exclude emergency access accounts to prevent tenant lockout. |
| Regularly update Named Locations | IP ranges change, new offices open, and VPN providers update their IP blocks. Keep your Named Locations current to prevent false positives. |
| Use meaningful naming conventions | Names like “Corporate-Office-NYC-IPv4” are clearer than “Location1” when managing multiple policies. |
| Combine with other conditions | Location is most powerful when combined with user risk, device compliance, and other signals in your policies. |
| Monitor sign-in logs | Regularly review sign-in logs to identify legitimate users being blocked and adjust your policies accordingly. |
| Stage your rollout | Apply location-based policies to pilot groups before rolling out to the entire organization. |
Troubleshooting Location-Based Conditional Access Policies
Even with careful planning, you may encounter issues with your location-based policies. Here are the most common problems and how to resolve them:
Issue 1: Users Are Blocked from Legitimate Locations
Symptom: A legitimate user is blocked by your location-based policy even though they are in an allowed location.
Resolution:
- Check the sign-in logs to see the IP address that Entra ID detected. Compare this with the user’s actual location.
- If the IP is incorrectly geolocated, consider creating an IP ranges Named Location as an exclusion.
- If the user is using a VPN, they may need to use a different VPN endpoint or be added to an exclusion list.
Issue 2: Policy Is Not Blocking Attempts
Symptom: Your location-based policy appears to be configured correctly, but sign-ins from blocked countries are still being allowed.
Resolution:
- Verify that the policy is in “On” mode, not “Report-only.”
- Check that the Named Location is correctly configured and includes the countries you want to block.
- Verify that the user is not excluded from the policy through a group membership or other exclusion.
Issue 3: GPS Location Requests Are Failing
Symptom: Users are being blocked because they are not sharing their GPS location for your location-based policy.
Resolution:
- Ensure users have the Microsoft Authenticator app installed and updated.
- Verify that the app has permission to access the device’s location.
- Consider using IP-based location as a fallback for users who cannot share GPS.
Issue 4: IP Geolocation Is Inaccurate
Symptom: Entra ID is mapping a user’s IP address to the wrong country, causing false positives or false negatives in your location-based policies.
Resolution:
- Create an IP ranges Named Location for the specific IP address or range and add it as an exclusion.
- If the issue is widespread, consider using the “Unknown areas” option in your Named Location settings.
Frequently Asked Questions (FAQs)
Q1: What is the difference between IP-based and country-based location policies?
- A: IP-based location policies use specific IP address ranges (e.g., your corporate office network). Country-based policies use geographic regions. IP-based policies are more precise but require more maintenance. Country-based policies are broader but easier to manage.
Q2: Can I use location-based policies with guest users?
- A: Yes. Location-based Conditional Access policies apply to guest users (B2B) accessing your tenant, just like internal users. This is important for enforcing data sovereignty requirements across your entire ecosystem.
Q3: How does Entra ID determine a user’s location?
- A: Entra ID primarily uses the user’s public IP address. For users with the Microsoft Authenticator app, it can also use GPS coordinates for greater accuracy.
Q4: What happens if a user’s location can’t be determined?
- A: If a location cannot be determined, the user is treated as being in an “unknown area.” Depending on your location-based policy configuration, this may result in a block or an MFA challenge.
Q5: Do location-based policies work with IPv6?
- A: Yes. Microsoft Entra ID supports IPv6 for location-based Conditional Access policies.
Q6: Can I create a location-based policy that only applies to specific applications?
- A: Yes. Under “Target resources,” you can select specific cloud apps instead of “All resources.” This allows you to apply location-based policies to sensitive applications like Dynamics 365 or custom Line-of-Business apps.
Q7: How long does it take for a location-based policy to take effect?
- A: Location-based Conditional Access policies typically take effect within 5-10 minutes after creation or modification. However, token caching on clients may cause delays.
Q8: Can I use location-based policies with Security Defaults?
- A: No. Security Defaults provide basic protection but do not support custom location-based policies. You need Entra ID Premium P1 or P2 licenses for granular location-based controls.
Conclusion: Secure Your Entra ID Tenant with Location-Based Policies
Location-based Conditional Access policies are one of the most powerful and immediately impactful security controls available in Microsoft Entra ID. They allow you to enforce Zero Trust principles by continuously verifying the network location of every sign-in attempt.
In this comprehensive guide, we covered:
- What location-based Conditional Access policies are and why they are essential for Zero Trust security
- How Named Locations work and the two types available: IP ranges and countries
- A complete step-by-step guide to creating Named Locations and configuring your first location-based policy
- How to test location-based policies using Report-Only mode and the What-If tool
- Four common scenarios for location-based policies: blocking high-risk countries, requiring MFA outside trusted networks, blocking unknown areas, and GPS-based location for mobile users
- Best practices and troubleshooting to keep your location-based Conditional Access policies running smoothly
The journey to a more secure Entra ID tenant starts with a single policy. Location-based Conditional Access policies are the perfect starting point because they deliver immediate security benefits with minimal user impact when configured correctly.
Start with a simple policy—perhaps blocking access from high-risk countries—test it in Report-Only mode, and gradually expand your location-based policies to cover more scenarios. Each policy you add is another layer of protection that attackers must bypass.
Remember: location-based Conditional Access policies are most powerful when combined with other conditions like user risk, device compliance, and application sensitivity. Build your Zero Trust architecture one policy at a time.
Explore more on Byqus Tutorials and Entra ID / Identity Section.